Cherry Cheesecake Brownie Cups
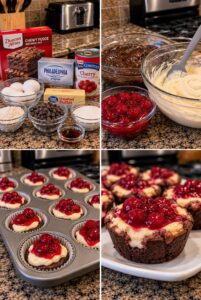
These Cherry Cheesecake Brownie Cups combine fudgy chocolate brownie bases, a creamy no-fuss cheesecake layer, and a glossy cherry topping. They’re rich, chocolatey, and tangy-sweet, like a chocolate-covered cherry and a slice of cheesecake in one bite.
They’re perfect for Valentine’s Day, Christmas, Mother’s Day, summer parties, potlucks, bake sales, birthday gatherings, or any dessert table.
Prep Time: 25 minutes
Bake Time: 22–26 minutes
Chill Time: 2 hours
Total Time: Approximately 3 hours
Servings: 12 brownie cups
Why You’ll Love This Recipe
- Fudgy chocolate brownie base
- Creamy cheesecake layer
- Sweet-tart cherry topping
- Easy individual servings
- Made with a simple brownie mix
- No springform pan required
- Beautiful on a dessert table
- Simple to prepare ahead
- Great for holidays and parties
- Freezer-friendly
Ingredients
Brownie Base
- 1 box (about 18 ounces) fudge brownie mix, plus the ingredients listed on the box (typically oil, water, and eggs)
- Nonstick cooking spray or paper liners
Cheesecake Layer
- 8 ounces cream cheese, softened
- ¼ cup granulated sugar
- 1 large egg, at room temperature
- 2 tablespoons sour cream
- 1 teaspoon vanilla extract
- ½ teaspoon almond extract, optional
- 1 tablespoon all-purpose flour
Cherry Topping
- 1 can (21 ounces) cherry pie filling
- ½ teaspoon lemon juice
Optional Garnishes
- Whipped cream
- Chocolate shavings
- Chocolate sauce
- Fresh cherries
- Mini chocolate chips
How to Make Cherry Cheesecake Brownie Cups
Step 1: Preheat the Oven
Preheat your oven to 350°F.
Line a standard 12-cup muffin pan with paper liners, or grease it generously with nonstick spray.
Step 2: Mix the Brownie Batter
Prepare the brownie mix according to the package directions.
Stir until just combined, being careful not to overmix.
Step 3: Fill the Cups
Divide the batter evenly among the muffin cups, filling each about half full.
Smooth the tops gently with the back of a spoon.
Make the Cheesecake Layer
Step 4: Beat the Cream Cheese
Beat the softened cream cheese on medium-low speed until completely smooth.
Scrape the sides and bottom of the bowl to remove any lumps.
Step 5: Add the Remaining Ingredients
Add the sugar and mix just until combined.
Add the egg, sour cream, vanilla, almond extract, and flour. Mix on low speed until smooth, taking care not to overmix.
Step 6: Add the Cheesecake
Spoon about 2 tablespoons of the cheesecake batter over the brownie batter in each cup.
Smooth the tops, filling each cup almost to the top.
Bake and Chill
Step 7: Bake
Bake for approximately 22–26 minutes.
The cheesecake layer should be set at the edges with only a slight wobble in the center, and a toothpick inserted into the brownie edge should have a few moist crumbs.
Step 8: Cool
Let the brownie cups cool in the pan for 15 minutes.
Run a knife around the edges if needed, then transfer them to a wire rack and cool completely.
Step 9: Chill
Cover and refrigerate for at least two hours.
Chilling sets the cheesecake and makes the brownie cups easier to serve.
Prepare the Cherry Topping
Step 10: Mix the Cherries
Stir the lemon juice into the cherry pie filling.
If the cherries are large, chop them roughly so they sit neatly on top of each cup.
Step 11: Add the Topping
Spoon the cherry topping over each chilled brownie cup.
Allow some of the glossy sauce to run down the sides for a pretty finish.
Step 12: Garnish and Serve
Top with whipped cream, chocolate shavings, or a drizzle of chocolate sauce.
Keep refrigerated until ready to serve.
The Best Brownie Mix to Use
Choose a mix that bakes up fudgy and dense.
Good options include:
- Fudge brownie mix
- Double chocolate brownie mix
- Dark chocolate brownie mix
- Triple chocolate brownie mix
- Homemade brownie batter
- Gluten-free brownie mix
Fudgy brownie mixes hold up best under the cheesecake layer.
How to Get Perfect Brownie Cups
- Grease the pan thoroughly or use liners
- Fill the cups only halfway with brownie batter
- Use room-temperature cream cheese
- Mix the cheesecake batter gently
- Do not overbake
- Cool completely before chilling
- Add the topping after chilling
A gentle hand with the cheesecake batter prevents cracks and a puffy top.
Can I Use Fresh Cherries?
Yes. Cook 2 cups of pitted, halved cherries with 2 tablespoons of sugar, 1 tablespoon of lemon juice, and 1 teaspoon of cornstarch mixed with 1 tablespoon of water.
Simmer for 5–8 minutes, until thickened, then cool completely before spooning over the brownie cups.
Can I Use a Different Fruit Topping?
Yes. Replace the cherry filling with:
- Raspberry pie filling
- Strawberry pie filling
- Blueberry pie filling
- Fresh raspberries
- Salted caramel sauce
- Chocolate ganache
Raspberries pair especially well with chocolate and cheesecake.
Delicious Variations
Black Forest Brownie Cups
Top with whipped cream, cherries, and chocolate shavings for a classic Black Forest look.
Chocolate-Covered Cherry Brownie Cups
Drizzle melted chocolate over the cherry topping and let it set.
Mini Cherry Cheesecake Brownie Bites
Use a mini muffin pan and bake for 14–17 minutes.
Raspberry Cheesecake Brownie Cups
Use raspberry preserves and fresh raspberries instead of cherries.
Cherry Almond Brownie Cups
Add ½ teaspoon of almond extract to the cherries and sprinkle with sliced almonds.
Can I Make Them Ahead?
Yes. Bake and chill the brownie cups up to two days in advance.
Store them covered in the refrigerator and add the cherry topping and garnishes shortly before serving.
This keeps the tops looking fresh and glossy.
Storage
Store the brownie cups in an airtight container in the refrigerator.
Refrigerate for up to four days.
Store the cherry topping separately when possible to keep the cheesecake surface firm.
Can You Freeze Cherry Cheesecake Brownie Cups?
Yes. Freeze the plain brownie cups without the topping.
Once firm, place them in a freezer-safe container and freeze for up to two months.
Thaw overnight in the refrigerator and add the cherry topping before serving.
Frequently Asked Questions
Do I need a mini cheesecake pan?
No. A standard muffin pan with liners works perfectly.
How do I know when they’re done?
The cheesecake layer should be set at the edges, with only a slight wobble in the center.
Why did my cheesecake layer sink?
It may have puffed from overmixing and then settled while cooling. Mix gently and cool the cups gradually.
Why is my filling lumpy?
The cream cheese was probably too cold. Let it soften fully before mixing.
Can I use a mini muffin pan?
Yes. Use a smaller amount of batter and begin checking after about 14 minutes.
Can I use homemade brownies?
Yes. Use your favorite brownie recipe, enough for 12 cups, and adjust the bake time as needed.
Can I skip the almond extract?
Yes. The vanilla alone is delicious.
Pro Tips
Fill the cups only halfway with brownie batter so the cheesecake has room.
Mix the cheesecake layer gently to avoid cracks.
Chill the brownie cups before topping for clean, neat finishes.
Add the cherry topping just before serving so the cups stay fresh and glossy.
Final Thoughts
These Cherry Cheesecake Brownie Cups bring together fudgy brownie, creamy cheesecake, and sweet cherries in one irresistible bite-sized dessert.
They’re easy to prepare, simple to make ahead, and perfect for holidays, parties, potlucks, or any occasion that calls for something rich and indulgent.