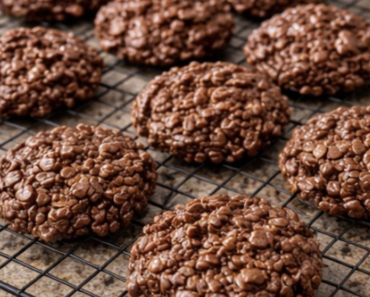
Spooky Spider Peanut Butter Cookies
These Spooky Spider Peanut Butter Cookies transform soft, chewy peanut butter cookies into adorable Halloween treats. Each cookie is decorated with a chocolate candy body, melted chocolate legs, and playful candy eyes.
They’re perfect for Halloween parties, school celebrations, bake sales, movie nights, or a fun afternoon of baking with the family.
Prep Time: 25 minutes
Bake Time: 10–12 minutes
Cooling and Decorating Time: 30 minutes
Total Time: Approximately 1 hour
Servings: 24 cookies
Why You’ll Love This Recipe
- Soft and chewy peanut butter cookies
- Easy spider decorations
- Perfect for Halloween
- Fun for children to help make
- Simple pantry ingredients
- No complicated decorating skills required
- Great for parties and bake sales
- Easy to prepare ahead
- Delicious peanut butter and chocolate combination
- Each spider can have its own expression
Ingredients
Peanut Butter Cookies
- ½ cup unsalted butter, softened
- ½ cup creamy peanut butter
- ½ cup granulated sugar
- ½ cup packed light brown sugar
- 1 large egg
- 1 teaspoon vanilla extract
- 1¼ cups all-purpose flour
- ½ teaspoon baking soda
- ¼ teaspoon baking powder
- ¼ teaspoon salt
- ¼ cup granulated sugar, for rolling
Spider Decorations
- 24 round chocolate truffles, peanut butter cups, or chocolate candies
- ½ cup semisweet chocolate chips
- 48 small candy eyes
- 1 teaspoon coconut oil or vegetable shortening, optional
How to Make Spooky Spider Peanut Butter Cookies
Step 1: Preheat the Oven
Preheat your oven to 350°F.
Line two large baking sheets with parchment paper or silicone baking mats.
Step 2: Cream the Butter and Peanut Butter
Place the softened butter and creamy peanut butter in a large mixing bowl.
Beat with an electric mixer for approximately one minute, until smooth and creamy.
Step 3: Add the Sugars
Add the granulated sugar and brown sugar.
Beat for another two minutes, until the mixture becomes light and fluffy.
Step 4: Add the Egg and Vanilla
Add the egg and vanilla extract.
Continue mixing until everything is completely combined.
Scrape down the sides of the bowl as needed.
Step 5: Combine the Dry Ingredients
In a separate bowl, whisk together the flour, baking soda, baking powder, and salt.
Mixing the dry ingredients separately helps distribute the leavening evenly.
Step 6: Make the Dough
Gradually add the dry ingredients to the peanut butter mixture.
Mix on low speed just until a soft dough forms. Avoid overmixing, which can make the cookies firm instead of tender.
Step 7: Shape the Cookies
Scoop the dough into approximately one-tablespoon portions.
Roll each portion into a ball, then coat it lightly in granulated sugar.
Arrange the dough balls approximately two inches apart on the prepared baking sheets.
Step 8: Bake
Bake for 10–12 minutes, or until the edges are set and lightly golden.
The centers should still look slightly soft when the cookies are removed from the oven.
Step 9: Create the Spider Wells
Allow the cookies to cool on the baking sheet for two minutes.
While they are still warm, gently press the back of a teaspoon into the center of each cookie to create a shallow indentation.
Do not add the chocolate candies yet if they melt easily.
Step 10: Cool
Leave the cookies on the baking sheet for approximately five minutes.
Transfer them to a wire rack and allow them to cool almost completely.
How to Decorate the Spider Cookies
Step 11: Melt the Chocolate
Place the chocolate chips in a microwave-safe bowl.
Microwave in 20-second intervals, stirring between each interval, until smooth.
If the chocolate is too thick for piping, stir in one teaspoon of coconut oil or shortening.
Step 12: Attach the Spider Bodies
Spoon a small dot of melted chocolate into the indentation on each cookie.
Place one round chocolate candy on top and press gently to secure it.
Step 13: Add the Candy Eyes
Use a toothpick to place two tiny dots of melted chocolate on each spider body.
Press one candy eye onto each dot.
Step 14: Pipe the Legs
Transfer the remaining melted chocolate to a piping bag or resealable plastic bag.
Cut a very small opening in one corner.
Pipe four curved legs on each side of every chocolate spider body.
Step 15: Let the Chocolate Set
Leave the decorated cookies at room temperature until the chocolate becomes firm.
For faster setting, refrigerate the cookies for approximately 10 minutes.
The Best Chocolate Candy for the Spider Bodies
Round or dome-shaped chocolate candies create the most recognizable spider shape.
Good options include:
- Mini peanut butter cups
- Chocolate truffles
- Rolo candies
- Chocolate-covered malt balls
- Lindor truffles
- Hershey’s Kisses
- Large chocolate chips
If using miniature peanut butter cups, turn them upside down before attaching them to the cookies.
How to Keep the Chocolate from Melting
Allow the cookies to cool before adding the candy bodies.
If the cookies are too warm, the chocolate will melt and lose its shape. The cookies should be slightly warm or completely cool when decorated.
Use melted chocolate as edible glue to secure the candies.
Can I Use Refrigerated Cookie Dough?
Yes. Refrigerated peanut butter or sugar cookie dough makes this recipe even faster.
Portion, roll, and bake the dough according to the package directions. Create the center indentations while the cookies are warm, then decorate after cooling.
Can I Make Them Without Peanut Butter?
Yes. Use sugar cookie, chocolate chip cookie, or chocolate cookie dough instead.
For a nut-free classroom treat, confirm that the cookie dough, chocolates, and candy eyes were manufactured in a nut-free facility.
Fun Variations
Double Chocolate Spider Cookies
Use chocolate cookie dough and decorate with milk or white chocolate spider bodies.
Reese’s Spider Cookies
Use mini Reese’s Peanut Butter Cups for the bodies and pipe the legs with melted semisweet chocolate.
Colorful Spider Cookies
Use orange, purple, or green candy melts for the legs.
Hairy Spider Cookies
Sprinkle chocolate jimmies over the candy bodies before the melted chocolate sets.
Black Widow Cookies
Use dark chocolate bodies and add a small red icing mark.
Monster Spider Cookies
Add three or four candy eyes to each spider instead of two.
Can I Make the Dough Ahead?
Yes. Prepare the cookie dough and refrigerate it in an airtight container for up to three days.
Allow the chilled dough to soften at room temperature for approximately 15 minutes before rolling.
You can also freeze the shaped dough balls for up to two months.
Storage
Store the decorated cookies in an airtight container at room temperature for up to five days.
Place parchment paper between layers to protect the chocolate decorations.
Keep the cookies in a cool area so the spider bodies and legs do not melt.
Can You Freeze Spider Cookies?
The undecorated cookies freeze very well.
Place them in a freezer-safe container and freeze for up to three months. Thaw at room temperature before decorating.
Finished cookies can also be frozen, but the candy eyes may develop spots or discoloration after thawing.
Frequently Asked Questions
Why are my peanut butter cookies dry?
Too much flour or overbaking can make the cookies dry. Measure the flour carefully and remove the cookies while their centers are still soft.
Do I need to chill the dough?
No. This dough can be baked immediately. If it feels excessively soft, refrigerate it for 20–30 minutes.
When should I add the chocolate candies?
Add them when the cookies are almost or completely cool so they maintain their shape.
What can I use instead of candy eyes?
Pipe small dots of white chocolate and add tiny dark chocolate pupils.
Can children help decorate them?
Yes. Children can attach the candy bodies and eyes. An adult should handle hot pans and melted chocolate.
How do I keep the spider legs neat?
Use a piping bag with a very small opening and allow the melted chocolate to cool slightly before piping.
Can I make larger cookies?
Yes. Use two tablespoons of dough per cookie and add approximately two minutes to the baking time.
Are these cookies suitable for school parties?
They can be, but peanut allergies are common. Check the school’s food and allergy policies first.
Pro Tips
Use regular creamy peanut butter rather than natural peanut butter, which may make the dough oily or crumbly.
Remove the cookies from the oven while the centers still appear soft. They will continue baking on the hot pan.
Let the cookies cool before attaching the chocolate spider bodies, and cut only a tiny opening in the piping bag for clean, controlled legs.
Final Thoughts
These Spooky Spider Peanut Butter Cookies are soft, chewy, chocolatey, and perfect for Halloween. The playful spider decorations look impressive but require only chocolate candies, melted chocolate, and candy eyes.
Serve them at Halloween parties, add them to treat boxes, or make them with the family for a fun and delicious seasonal activity.