
No-Bake Oreo Santa Hat Cheesecake Bites
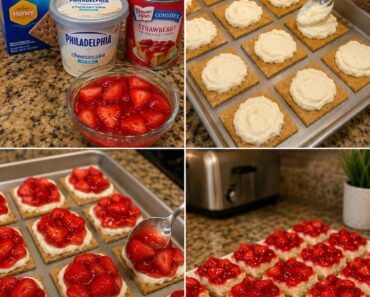
These No-Bake Oreo Santa Hat Cheesecake Bites turn chocolate sandwich cookies, creamy cheesecake filling, and fresh strawberries into a festive Christmas dessert. Each bite is topped with a strawberry “hat,” a fluffy white cheesecake border, and a mini marshmallow pom-pom.
They’re easy to assemble, require no oven, and look right at home on a holiday dessert table. Make them a few hours ahead so the cheesecake topping can chill and firm before serving.
Prep Time: 30 minutes
Chill Time: 2 hours
Total Time: About 2 hours 30 minutes
Servings: 20–24 bites
Why You’ll Love This Recipe
- No baking is needed, so the oven stays free for holiday cooking.
- Oreo cookies make quick, chocolatey individual bases.
- The cheesecake topping is creamy, light, and easy to prepare.
- Fresh strawberries create simple Santa hats without complicated decorating.
- The bites can be assembled ahead and chilled until dessert time.
- Each one is individually portioned and easy to serve at parties.
Ingredients
- 20–24 Oreo cookies
- 8 ounces cream cheese, softened
- 1 package (3.4 ounces) instant cheesecake pudding mix
- ½ cup powdered sugar
- 1 teaspoon vanilla extract
- 1 tub (8 ounces) whipped topping, thawed
- 20–24 medium strawberries, washed and thoroughly dried
- 20–24 mini marshmallows
- Red and white Christmas sprinkles, optional
How to Make No-Bake Oreo Santa Hat Cheesecake Bites
Step 1: Prepare the Strawberries
Wash the strawberries and dry them thoroughly with paper towels. Remove the leafy tops, then trim the stem end flat so each strawberry can stand upright.
Choose strawberries that are similar in size. Patting them dry helps the cheesecake topping cling and prevents extra moisture from making the cookies soft.
Step 2: Make the Cheesecake Filling
In a medium bowl, beat the softened cream cheese until smooth. Add the dry instant cheesecake pudding mix, powdered sugar, and vanilla extract. Beat again until combined, scraping down the sides of the bowl as needed.
The mixture will be thick at this stage. Add the whipped topping and gently fold it in until the filling is smooth and fluffy. Avoid stirring too vigorously so the mixture keeps its light texture.
Step 3: Prepare the Piping Bag
Spoon the cheesecake mixture into a piping bag fitted with a large round or star tip. If you don’t have a piping bag, use a zip-top bag and snip off one corner.
Chill the filling for about 15–20 minutes if it feels too soft to pipe. This helps the topping hold its shape around the strawberries.
Step 4: Add Cheesecake Filling to the Oreos
Arrange the Oreo cookies in a single layer on a parchment-lined baking sheet or serving tray. Pipe a generous swirl or ring of cheesecake filling onto the center of each cookie, leaving enough space for the strawberry to sit on top.
Make the filling slightly wider than the strawberry base. This creates the white trim of the Santa hat and helps secure the fruit.
Step 5: Add the Strawberry Hats
Place one strawberry upright on top of the cheesecake filling on each Oreo, with the pointed end facing up. Press gently so the strawberry settles into the filling without crushing the cookie.
Pipe a small dot of cheesecake filling around the base of each strawberry to create the fluffy hat trim.
Step 6: Add the Marshmallow Pom-Poms
Place one mini marshmallow on the tip of each strawberry. If needed, add a tiny dab of cheesecake filling to help it stick.
Finish with a few red and white sprinkles, if desired.
Step 7: Chill Before Serving
Refrigerate the bites for at least 2 hours, or until the cheesecake filling is firm. Keep them chilled until serving, and arrange them on a platter just before guests arrive.
Tips for the Best Oreo Santa Hat Cheesecake Bites
- Dry the strawberries well. Excess water can make the cheesecake topping slippery and soften the cookies.
- Use softened cream cheese. Let it sit at room temperature for about 30 minutes so it blends smoothly.
- Fold in the whipped topping gently. This keeps the filling light and easy to pipe.
- Choose flat-bottomed strawberries. Trim the stem ends if needed so the berries sit upright.
- Pipe enough filling under each berry. A thicker layer helps the strawberry stay in place.
- Chill the filling if it’s soft. A short rest in the refrigerator makes it easier to pipe neatly.
- Assemble close to serving time. The strawberries release moisture as they sit, which can soften the cookies.
- Use a tray with a rim. It makes the bites easier to move into and out of the refrigerator.
Easy Variations
Use Chocolate-Covered Strawberries
Dip the strawberries in melted white chocolate and let them set before placing them on the cheesecake filling. Add the marshmallow pom-poms after the coating firms up.
Make Mini Cheesecake Bases
For a firmer base, crush the Oreos and mix them with melted butter. Press the crumbs into a mini muffin pan lined with paper cups, then chill until firm before adding the filling and strawberries.
Add a White Chocolate Drizzle
Drizzle melted white chocolate over the finished bites for extra sweetness and a decorative finish. Let the drizzle set before serving.
Use Different Cookies
Chocolate wafer cookies or chocolate graham crackers can replace the Oreos. Choose cookies sturdy enough to hold the cheesecake filling and strawberry topping.
Add a Little Citrus
Mix ½ teaspoon of finely grated orange zest into the cheesecake filling for a subtle citrus note that pairs well with the strawberries.
Make-Ahead and Storage
For the freshest texture, prepare the cheesecake filling up to 1 day ahead and store it covered in the refrigerator. Wash and dry the strawberries ahead of time, but keep them separate until you’re ready to assemble.
Once assembled, refrigerate the bites in a single layer in an airtight container and serve them within 24 hours. The cookies will gradually soften as they sit, and the strawberries may release juice.
These bites are best served cold. Freezing is not recommended because thawed strawberries can become watery and the whipped topping may lose its smooth texture.
Frequently Asked Questions
Can I make these the night before?
You can assemble them the night before, but the cookies may soften and the strawberries may release moisture. For the best texture, prepare the filling ahead and assemble the bites a few hours before serving.
Do I use the pudding mix dry?
Yes. Add the instant cheesecake pudding mix directly to the cream cheese and powdered sugar. Do not prepare it with milk first.
Can I use regular whipped cream instead of whipped topping?
You can use homemade whipped cream, but it may not hold its shape as long. For a more stable filling, whip 1 cup of cold heavy cream to stiff peaks and fold it into the cream cheese mixture.
Why is my cheesecake filling too soft to pipe?
The cream cheese may have been too warm, or the whipped topping may not have been fully thawed and drained of excess moisture. Chill the mixture for 15–20 minutes before piping.
How do I keep the strawberries upright?
Choose berries with flat bases, trim the stem ends evenly, and pipe a thick ring of cheesecake filling beneath each one. Press the strawberry gently into the filling.
Can I make these without a piping bag?
Yes. Use a small spoon to place the filling on each Oreo, then spread it into a ring. A zip-top bag with one corner snipped off also works.
Should I refrigerate the bites?
Yes. The filling contains cream cheese and whipped topping, so keep the bites refrigerated until serving. Return leftovers to the refrigerator promptly.
How many bites does the recipe make?
The recipe makes about 20–24 bites, depending on the size of the Oreos and strawberries and how generously you pipe the filling.
Final Thoughts
These No-Bake Oreo Santa Hat Cheesecake Bites make a playful holiday dessert from simple ingredients. A chocolate cookie, fluffy cheesecake topping, fresh strawberry, and mini marshmallow come together in a festive little treat that’s easy to make ahead and share.