Cheesecake Chocolate Chip Cookie Cups
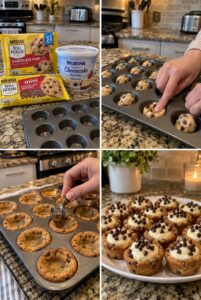
These Cheesecake Chocolate Chip Cookie Cups combine two favorite desserts in one irresistible bite. Soft, buttery chocolate chip cookie cups are filled with smooth vanilla cheesecake filling and finished with miniature chocolate chips.
They’re perfect for parties, holidays, bake sales, birthday celebrations, dessert tables, or whenever you want an easy handheld treat.
Prep Time: 25 minutes
Bake Time: 10–12 minutes
Chill Time: 1 hour
Total Time: Approximately 1 hour 45 minutes
Servings: 24 mini cookie cups
Why You’ll Love This Recipe
- Combines cookies and cheesecake
- Soft, chewy cookie base
- Creamy no-bake cheesecake filling
- Easy to serve without utensils
- Perfect for parties and holidays
- Can be prepared ahead
- Simple ingredients
- Easy to decorate
- Freezer-friendly cookie shells
- Delicious served chilled
Ingredients
Chocolate Chip Cookie Cups
- ½ cup unsalted butter, softened
- ½ cup packed light brown sugar
- ¼ cup granulated sugar
- 1 large egg
- 1 teaspoon vanilla extract
- 1¼ cups all-purpose flour
- ½ teaspoon baking soda
- ¼ teaspoon salt
- ¾ cup miniature chocolate chips
Cheesecake Filling
- 8 ounces cream cheese, softened
- ½ cup powdered sugar
- 1 teaspoon vanilla extract
- 1 teaspoon fresh lemon juice, optional
- ¾ cup heavy whipping cream, cold
Optional Toppings
- Miniature chocolate chips
- Chocolate curls
- Chocolate sauce
- Caramel sauce
- Crushed chocolate chip cookies
- Fresh strawberries
- Fresh raspberries
- Chopped toasted pecans
- Whipped cream
How to Make Cheesecake Chocolate Chip Cookie Cups
Step 1: Preheat the Oven
Preheat your oven to 350°F.
Lightly coat a 24-cup mini muffin pan with nonstick cooking spray.
Even if your pan is nonstick, greasing it lightly makes the baked cookie cups easier to remove.
Step 2: Cream the Butter and Sugars
Place the softened butter, brown sugar, and granulated sugar in a large mixing bowl.
Beat with an electric mixer for approximately 2–3 minutes, or until the mixture becomes light and creamy.
Scrape down the sides of the bowl as needed.
Step 3: Add the Egg and Vanilla
Add the egg and vanilla extract.
Continue mixing until everything is smooth and evenly combined.
Avoid overmixing once the egg has been incorporated.
Step 4: Combine the Dry Ingredients
In a separate bowl, whisk together the flour, baking soda, and salt.
This distributes the baking soda evenly and helps the cookie cups bake consistently.
Step 5: Make the Cookie Dough
Gradually add the dry ingredients to the butter mixture.
Mix on low speed just until a soft dough forms.
Fold in the miniature chocolate chips with a spatula.
Mini chips work especially well because they distribute evenly throughout the small cookie cups.
Step 6: Fill the Muffin Pan
Scoop approximately one tablespoon of cookie dough into each prepared mini muffin cup.
Press the dough gently into the bottom of each cavity. There is no need to shape the center before baking.
Don’t overfill the cups because the dough will expand in the oven.
Step 7: Bake
Bake the cookie cups for approximately 10–12 minutes.
They should be lightly golden around the edges but still slightly soft in the center.
Avoid overbaking, or the cookie cups may become hard after cooling.
Step 8: Shape the Cups
Remove the pan from the oven.
While the cookies are still warm, press down the center of each one using the rounded end of a wooden spoon, a small measuring spoon, or a tart shaper.
Press firmly enough to create a cavity without breaking through the bottom.
Step 9: Cool Completely
Allow the cookie cups to cool in the pan for approximately 15 minutes.
Carefully loosen the edges with a thin knife and transfer the cups to a wire rack.
Let them cool completely before adding the cheesecake filling. Warm cookie cups can melt the filling.
Step 10: Beat the Cream Cheese
Place the softened cream cheese in a clean mixing bowl.
Beat it for approximately one minute, or until completely smooth.
Using properly softened cream cheese prevents lumps in the filling.
Step 11: Add the Sugar and Flavoring
Add the powdered sugar, vanilla extract, and optional lemon juice.
Beat until the mixture is creamy and evenly combined.
The lemon juice doesn’t make the filling taste strongly of lemon. It simply adds a little brightness to the cheesecake flavor.
Step 12: Whip the Cream
In a separate chilled bowl, beat the cold heavy whipping cream until stiff peaks form.
Stop mixing once the cream holds its shape. Overbeating can make it grainy.
Step 13: Finish the Cheesecake Filling
Gently fold the whipped cream into the cream cheese mixture.
Continue folding until no white streaks remain and the filling is light and fluffy.
Don’t stir aggressively, or the filling may lose its airy texture.
Step 14: Fill the Cookie Cups
Transfer the cheesecake mixture to a piping bag fitted with a star or round tip.
Pipe the filling into each cooled cookie cup.
If you don’t have a piping bag, use a zip-top bag with one corner snipped off or spoon the filling into the cups.
Step 15: Decorate
Sprinkle miniature chocolate chips over the cheesecake filling.
Add chocolate curls, cookie crumbs, caramel sauce, or another desired topping.
Step 16: Chill
Place the filled cookie cups in the refrigerator for at least one hour.
Chilling helps the cheesecake filling become firmer and allows the flavors to develop.
Step 17: Serve
Serve the cookie cups chilled or let them sit at room temperature for approximately 10 minutes before serving.
Keep them refrigerated when they’re not being served.
Can I Use Refrigerated Cookie Dough?
Yes. Refrigerated chocolate chip cookie dough makes this recipe especially quick.
Divide approximately 16–18 ounces of refrigerated dough among the cavities of a greased mini muffin pan. Bake and shape the cups according to the recipe instructions.
Premade dough may spread differently depending on the brand, so check the cups a few minutes before the suggested baking time ends.
How to Keep the Cookie Cups Soft
Remove the cookie cups from the oven when the edges are lightly golden and the centers still look slightly underbaked.
They’ll continue cooking from the heat of the muffin pan.
Other helpful tips include:
- Measure the flour accurately
- Use softened rather than melted butter
- Don’t overmix the dough
- Don’t overbake the cups
- Store them in an airtight container
- Fill them shortly before serving for the softest texture
Why Did My Cookie Cups Puff Up?
Chocolate chip cookie dough naturally rises and spreads during baking.
Pressing the centers immediately after the pan comes out of the oven creates the cup shape. If the centers rise again, press them down a second time before the cookies cool.
Use a measuring spoon that fits comfortably inside the muffin cavities.
Why Are My Cookie Cups Sticking?
The muffin pan may not have been greased sufficiently, or the cookies may still be too warm.
Allow the cups to cool for approximately 15 minutes before removing them. Run a thin knife gently around the edges and twist each cup slightly before lifting it out.
Don’t allow them to cool completely inside the pan because they may become more difficult to remove.
How to Prevent Lumpy Cheesecake Filling
Use cream cheese that has softened fully at room temperature.
Beat the cream cheese by itself before adding the powdered sugar and vanilla. Once it’s smooth, add the remaining ingredients.
Cold cream cheese is the most common reason cheesecake filling develops lumps.
Can I Use Whipped Topping?
Yes. Replace the heavy whipping cream with approximately 1½ cups thawed whipped topping.
Beat the cream cheese, powdered sugar, and vanilla until smooth. Fold in the whipped topping until combined.
This version is convenient and holds its shape well when chilled.
Chocolate Cheesecake Cookie Cups
Add two tablespoons of unsweetened cocoa powder to the cheesecake filling.
You can also fold in melted semisweet chocolate after it has cooled slightly.
Finish the cups with chocolate chips, chocolate curls, or chocolate sauce.
Strawberry Cheesecake Cookie Cups
Spoon a small amount of strawberry preserves into each cooled cookie cup before adding the cheesecake filling.
Top each cup with a strawberry slice immediately before serving.
Avoid adding fresh fruit too far in advance because it can release moisture.
Salted Caramel Cookie Cups
Drizzle caramel sauce over the cheesecake filling.
Finish each cup with miniature chocolate chips and a small pinch of flaky sea salt.
For extra texture, add chopped toasted pecans.
Oreo Cheesecake Cookie Cups
Replace some or all of the chocolate chips with chopped chocolate sandwich cookies.
Fold finely crushed cookies into the cheesecake filling and garnish each cup with additional crumbs.
Peanut Butter Cheesecake Cookie Cups
Beat ¼ cup creamy peanut butter into the cream cheese mixture.
Decorate the cups with chopped peanut butter cups, chocolate drizzle, or roasted peanuts.
Mint Chocolate Cookie Cups
Add a small amount of peppermint extract to the cheesecake filling.
Peppermint extract is strong, so begin with approximately ⅛ teaspoon and adjust carefully.
Top with chocolate curls or crushed mint chocolate candies.
Can I Use a Standard Muffin Pan?
Yes. Divide the dough among approximately 10–12 greased standard muffin cavities.
Bake for approximately 13–16 minutes, then press down the centers while the cookies are still warm.
The larger cups will require more cheesecake filling and are better suited for individual plated desserts.
Decorating Ideas
Dress up these cookie cups with:
- Chocolate curls
- Miniature chocolate chips
- Colorful sprinkles
- Fresh berries
- Cookie crumbs
- Chopped candy bars
- Caramel drizzle
- Chocolate ganache
- Whipped cream
- Toasted nuts
Add wet toppings and fresh fruit shortly before serving to prevent the cookie shells from becoming soft.
What to Serve with Cookie Cups
These miniature desserts pair well with:
- Coffee
- Hot chocolate
- Cold milk
- Vanilla ice cream
- Fresh berries
- Chocolate-covered strawberries
- Fruit salad
- Other miniature desserts
They’re especially attractive when arranged on a dessert tray with brownies, truffles, and fresh fruit.
Can I Prepare Them Ahead?
Yes. Bake the cookie cups up to two days in advance.
Store the unfilled cups in an airtight container at room temperature. Prepare the cheesecake filling and refrigerate it separately.
Fill and decorate the cups several hours before serving. Once filled, keep them refrigerated.
Storage
Arrange the filled cookie cups in a single layer inside an airtight container.
Refrigerate them for up to 3–4 days.
Place parchment paper between layers if stacking is necessary, but avoid pressing the top layer into the cheesecake filling.
Because the filling contains cream cheese and whipped cream, don’t leave the cups at room temperature for more than two hours.
Can You Freeze Cheesecake Cookie Cups?
The unfilled cookie cups freeze very well.
Allow them to cool completely, then place them in a freezer-safe container. Freeze for up to 3 months.
Thaw the cups at room temperature before adding the fresh cheesecake filling.
The completed dessert can also be frozen, although the texture of the filling may change slightly. Freeze the filled cups until firm, then transfer them to an airtight container for up to one month. Thaw them overnight in the refrigerator.
Frequently Asked Questions
What are cheesecake chocolate chip cookie cups?
They’re miniature chocolate chip cookies baked in a muffin pan, shaped into cups, and filled with creamy cheesecake filling.
Do I need a special pan?
No. A regular mini muffin pan works perfectly.
When should I shape the cookie cups?
Press the centers down immediately after removing the pan from the oven while the cookies are still soft.
Can I use store-bought cookie dough?
Yes. Refrigerated chocolate chip cookie dough is a convenient substitute for homemade dough.
Does the cheesecake filling need to be baked?
No. This recipe uses a simple no-bake cheesecake filling.
Can I make the filling without heavy cream?
Yes. Use thawed whipped topping instead.
Why did my cookie cups become hard?
They were probably baked too long or contained too much flour. Remove them when the edges are lightly golden.
Can I make these in advance?
Yes. Bake the shells ahead and fill them on the day you plan to serve them.
How long can they remain at room temperature?
Because of the cheesecake filling, don’t leave them unrefrigerated for more than two hours.
Can I add fruit?
Yes. Strawberries, raspberries, blueberries, and cherries work well. Add fresh fruit shortly before serving.
Can I freeze them?
Yes. Freeze the unfilled cookie shells for the best texture.
How many cookie cups does this recipe make?
It makes approximately 24 miniature cookie cups.
Pro Tips
Measure the flour by spooning it into the measuring cup and leveling the top. Packing too much flour into the cup can create dry cookie shells.
Shape the centers as soon as the cookie cups leave the oven. If they begin to rise again, press them down once more before they cool.
Make sure the cookie shells are completely cool before adding the filling. For neat, bakery-style results, pipe the cheesecake mixture into the cups and add the toppings just before serving.
Final Thoughts
These Cheesecake Chocolate Chip Cookie Cups bring together chewy chocolate chip cookies and smooth vanilla cheesecake in a fun, bite-sized dessert.
Prepare them for birthdays, holidays, parties, bake sales, or a family dessert night. With their soft cookie shells, creamy centers, and miniature chocolate chip topping, they’re an easy treat that looks just as impressive as it tastes.