Taco Chicken Cream Cheese Roll-Ups
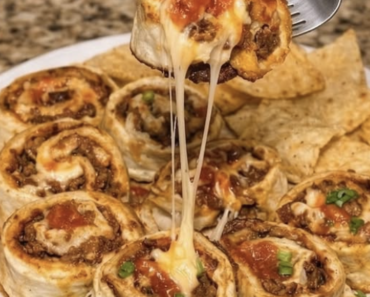
These Taco Chicken Cream Cheese Roll-Ups are filled with tender shredded chicken, sweet corn, salsa, Mexican-style cheese, and a creamy taco-seasoned filling. Rolled inside soft flour tortillas and baked until golden and crisp, they make an easy dinner, appetizer, or game-day snack.
Serve them warm with sour cream, salsa, guacamole, or queso for dipping.
Prep Time: 20 minutes
Bake Time: 18–22 minutes
Total Time: Approximately 40 minutes
Servings: 6–8
Why You’ll Love This Recipe
- Creamy, cheesy chicken filling
- Crispy baked tortillas
- Easy to prepare with cooked chicken
- Uses simple ingredients
- Great for parties and game day
- Mild enough for the entire family
- Easy to customize
- Delicious with your favorite dips
Ingredients
Chicken Filling
- 3 cups cooked and shredded chicken
- 8 ounces cream cheese, softened
- ½ cup sour cream
- ⅓ cup salsa
- 1 packet taco seasoning
- 1 cup corn, drained
- 1½ cups shredded Mexican-style cheese, divided
- 2 tablespoons chopped cilantro, optional
- 1 tablespoon lime juice, optional
For the Roll-Ups
- 8 large burrito-size flour tortillas
- Cooking spray or 2 tablespoons melted butter
- ½ teaspoon taco seasoning, optional
- Chopped cilantro for garnish
For Serving
- Sour cream
- Salsa
- Guacamole
- Pico de gallo
- Queso
- Lime wedges
How to Make Taco Chicken Cream Cheese Roll-Ups
Step 1: Preheat the Oven
Preheat your oven to 400°F.
Lightly grease a large baking sheet or line it with parchment paper.
Step 2: Soften the Cream Cheese
Place the softened cream cheese in a large mixing bowl.
Stir it until smooth so it blends evenly with the remaining ingredients.
If the cream cheese is still cold, microwave it for approximately 15–20 seconds.
Step 3: Make the Creamy Taco Mixture
Add the sour cream, salsa, and taco seasoning to the cream cheese.
Stir until the mixture is smooth and evenly seasoned.
Use a thick salsa to prevent the filling from becoming watery.
Step 4: Add the Chicken
Add the cooked shredded chicken to the bowl.
Stir until every piece of chicken is coated with the creamy taco mixture.
Rotisserie chicken works especially well and saves preparation time.
Step 5: Add the Corn and Cheese
Fold in the drained corn and one cup of shredded Mexican-style cheese.
Add cilantro and lime juice if desired.
Mix until all the filling ingredients are evenly distributed.
Step 6: Warm the Tortillas
Warm the tortillas in the microwave for approximately 20–30 seconds.
Soft, warm tortillas are easier to roll and less likely to crack.
Cover them with a slightly damp paper towel while heating.
Step 7: Fill the Tortillas
Place a tortilla on a clean work surface.
Spoon approximately ½ cup of chicken filling in a line near one edge, leaving space on both sides.
Avoid adding too much filling because overfilled tortillas may split or unroll while baking.
Step 8: Roll Them Up
Fold the sides of the tortilla slightly over the filling.
Roll the tortilla tightly into a cylinder.
Place it seam-side down on the prepared baking sheet.
Repeat with the remaining tortillas and filling.
Step 9: Add the Topping
Lightly coat the roll-ups with cooking spray or brush them with melted butter.
Sprinkle the remaining shredded cheese over the tops.
For extra taco flavor, add a light sprinkle of taco seasoning.
Step 10: Bake
Bake the roll-ups for approximately 18–22 minutes, or until the tortillas are golden and the filling is hot.
The cheese on top should be melted and lightly browned.
Step 11: Rest and Serve
Allow the roll-ups to rest for approximately 5 minutes.
Garnish with chopped cilantro and serve warm with sour cream and salsa.
The Best Chicken to Use
Any fully cooked, shredded chicken will work in this recipe.
Good options include:
- Rotisserie chicken
- Baked chicken breasts
- Poached chicken
- Leftover grilled chicken
- Slow-cooked shredded chicken
- Canned chicken, thoroughly drained
Remove the skin and bones before shredding rotisserie chicken.
How to Keep the Roll-Ups Crispy
Use thick salsa and drain the corn thoroughly so the filling isn’t watery.
Place each tortilla seam-side down and leave a little space between the roll-ups. This allows hot air to circulate around them.
Brushing the tortillas with melted butter creates a rich, golden exterior. Cooking spray produces a lighter but still crispy result.
Can I Make Them Spicy?
Yes. Add one or more of the following ingredients:
- Hot salsa
- Diced jalapeños
- Chopped green chiles
- Pepper Jack cheese
- Cayenne pepper
- Chipotle powder
- Hot sauce
- Crushed red pepper
For a family-friendly batch, keep the filling mild and serve hot sauce on the side.
Recipe Variations
Buffalo Chicken Roll-Ups
Replace the salsa and taco seasoning with buffalo sauce and ranch seasoning.
Use cheddar or Monterey Jack cheese and serve with ranch dressing.
Black Bean Chicken Roll-Ups
Add one cup of rinsed and drained black beans to the filling.
You may need one or two additional tortillas.
Chicken Bacon Ranch Roll-Ups
Replace the taco seasoning with ranch seasoning.
Add cooked crumbled bacon and use cheddar cheese.
Green Chile Chicken Roll-Ups
Replace the salsa with salsa verde and add one small can of diced green chiles.
Use Monterey Jack or Pepper Jack cheese.
Beef Taco Roll-Ups
Replace the chicken with cooked and drained ground beef.
Allow the beef to cool slightly before mixing it with the cream cheese.
What to Serve with Taco Chicken Roll-Ups
These roll-ups pair well with:
- Mexican rice
- Cilantro-lime rice
- Refried beans
- Black beans
- Corn salad
- Guacamole
- Pico de gallo
- Tortilla chips and queso
- Chopped green salad
- Avocado salad
They can also be sliced into smaller pieces and served as an appetizer.
Can I Prepare Them Ahead?
Yes. Prepare the filling up to 24 hours in advance and refrigerate it in an airtight container.
For the crispiest results, fill and roll the tortillas shortly before baking. If assembled too early, the tortillas may absorb moisture from the filling.
Storage
Place leftover roll-ups in an airtight container.
Refrigerate them for up to 3–4 days.
Allow the roll-ups to cool before covering them to prevent trapped steam from softening the tortillas.
How to Reheat the Roll-Ups
Reheat the roll-ups in a 375°F oven for approximately 10–12 minutes.
You can also warm them in an air fryer at 350°F for approximately 5–7 minutes.
A microwave works for quick reheating, but the tortillas will be softer.
Can You Freeze Them?
Yes. Assemble the roll-ups without baking them and arrange them on a parchment-lined baking sheet.
Freeze until firm, then transfer them to a freezer-safe container or bag. Freeze for up to 2 months.
Thaw overnight in the refrigerator before baking. Brush with butter or cooking spray and bake as directed, adding a few minutes if necessary.
Frequently Asked Questions
Can I use corn tortillas?
Small corn tortillas are more likely to crack. Flour tortillas are recommended for large roll-ups, but warmed corn tortillas can be used to make smaller portions.
Can I use leftover chicken?
Yes. This recipe is an excellent way to use leftover baked, grilled, or rotisserie chicken.
Why are my tortillas splitting?
The tortillas may be cold, dry, or overfilled. Warm them briefly and use slightly less filling.
Can I leave out the corn?
Absolutely. Replace it with black beans, diced peppers, or additional chicken.
What cheese works best?
A Mexican-style blend melts beautifully, but cheddar, Monterey Jack, Colby Jack, and Pepper Jack are also excellent choices.
Can I cook them in an air fryer?
Yes. Arrange them seam-side down in a single layer and air-fry at 375°F for 7–10 minutes, turning once if needed. Work in batches and check them early, since air fryers vary.
Pro Tips
Use softened cream cheese so the filling mixes smoothly. Drain the corn and choose thick salsa to avoid excess moisture.
Warm the tortillas before rolling, keep the filling away from the edges, and place each roll-up seam-side down.
Let the baked roll-ups rest for several minutes before serving because the creamy filling will be extremely hot.
Final Thoughts
These Taco Chicken Cream Cheese Roll-Ups combine creamy seasoned chicken, corn, salsa, and melted cheese inside golden flour tortillas. They’re simple enough for a weeknight dinner yet flavorful enough for parties, potlucks, and game-day gatherings.
Serve them with sour cream, salsa, or guacamole for a warm, cheesy meal everyone will enjoy.