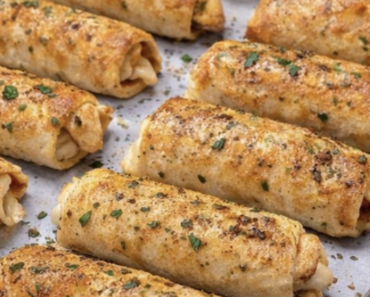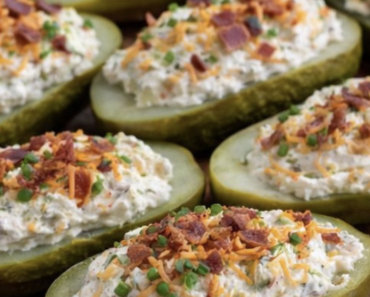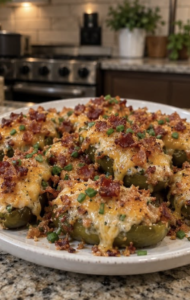
These Cheesy Pickle Bombs wrap tangy dill pickles and gooey cheese inside soft biscuit dough brushed with seasoned garlic butter. They bake until golden on the outside with a warm, melty center that brings together the flavors of fried pickles, cheese bites, and buttery bread.
They’re perfect for game day, parties, movie nights, after-school snacks, potlucks, or whenever you’re craving a quick, cheesy appetizer with plenty of pickle flavor.
Prep Time: 20 minutes
Bake Time: 15–18 minutes
Total Time: Approximately 40 minutes
Servings: 16 pickle bombs
Why You’ll Love This Recipe
- Gooey cheese center
- Tangy dill pickle flavor
- Golden, buttery biscuit dough
- Easy to assemble
- Uses simple ingredients
- Perfect for game day
- Family-friendly
- Easy to customize
- Delicious with dipping sauce
- Can be prepared in the oven or air fryer
Ingredients
Pickle Bombs
- 1 can (16.3 ounces) refrigerated biscuit dough containing 8 biscuits
- 16 thick dill pickle chips or small pickle chunks
- 4 ounces cheddar cheese, cut into 16 small cubes
- 4 ounces mozzarella cheese, cut into 16 small cubes
- 2 tablespoons all-purpose flour for shaping, if needed
Garlic Butter Topping
- 3 tablespoons unsalted butter, melted
- ½ teaspoon garlic powder
- ½ teaspoon dried dill
- ¼ teaspoon onion powder
- ¼ teaspoon smoked paprika
- 1 tablespoon grated Parmesan cheese
- Pinch of salt, optional
Optional Garnishes
- Chopped fresh dill
- Chopped parsley
- Extra grated Parmesan
- Crushed red pepper flakes
- Finely chopped pickles
Dipping Sauce Options
- Ranch dressing
- Spicy ranch
- Honey mustard
- Burger sauce
- Garlic aioli
- Chipotle mayonnaise
- Marinara sauce
- Warm cheese sauce
How to Make Cheesy Pickle Bombs
Step 1: Preheat the Oven
Preheat your oven to 375°F.
Line a large baking sheet with parchment paper or lightly coat it with nonstick cooking spray.
Parchment paper helps contain any cheese that escapes during baking.
Step 2: Dry the Pickles
Place the dill pickle chips or chunks on several layers of paper towel.
Cover them with another paper towel and press gently to remove as much surface moisture as possible.
This is one of the most important steps because wet pickles can make the dough soggy and difficult to seal.
Step 3: Prepare the Cheese
Cut the cheddar and mozzarella into small cubes.
Each piece should be small enough to fit inside the biscuit dough with the pickle.
You can use only cheddar, only mozzarella, or a combination of both.
Step 4: Divide the Biscuits
Open the biscuit package and separate the dough.
Cut each biscuit into two equal pieces to create 16 portions.
Keep the dough chilled until you are ready to shape it because warm biscuit dough becomes sticky.
Step 5: Flatten the Dough
Place one portion of dough on a lightly floured surface.
Flatten it into a circle approximately three inches wide using your fingers or a small rolling pin.
Keep the center slightly thicker than the edges so the filling does not break through.
Step 6: Add the Pickle
Place one thoroughly dried pickle chip or chunk in the center of the dough.
Avoid using an oversized piece because it may make the bomb difficult to seal.
Step 7: Add the Cheese
Place one cube of cheddar and one small cube of mozzarella over the pickle.
Do not overfill the dough. Excessive cheese can leak out during baking.
Step 8: Seal the Pickle Bomb
Bring the edges of the biscuit dough up and over the filling.
Pinch the seams tightly until the pickle and cheese are completely enclosed.
Roll the dough gently between your palms to create a smooth ball.
Step 9: Check the Seams
Examine the bottom and sides of each dough ball.
Pinch together any thin areas, gaps, or open seams.
A secure seal keeps most of the melted cheese inside.
Step 10: Arrange on the Baking Sheet
Place the balls seam-side down on the prepared baking sheet.
Leave approximately two inches of space between them so the dough can expand.
Step 11: Prepare the Garlic Butter
In a small bowl, combine the melted butter, garlic powder, dried dill, onion powder, smoked paprika, Parmesan, and a small pinch of salt.
Remember that pickles and cheese are already salty, so additional salt may not be necessary.
Step 12: Brush the Dough
Brush each pickle bomb generously with the seasoned butter.
Reserve a small amount for brushing over the bombs after baking.
Step 13: Bake
Bake for approximately 15–18 minutes, or until the tops are deeply golden and the dough is fully cooked.
Some cheese may escape onto the baking sheet. This is normal and will become deliciously crisp around the edges.
Step 14: Brush Again
Remove the pickle bombs from the oven.
Immediately brush them with the remaining garlic butter.
Sprinkle with fresh dill, parsley, or additional Parmesan if desired.
Step 15: Cool Briefly
Allow the bombs to rest for approximately 5 minutes.
The cheese inside will be extremely hot immediately after baking.
Resting also gives the melted cheese time to thicken slightly.
Step 16: Serve
Serve the cheesy pickle bombs warm with ranch dressing, spicy mayonnaise, honey mustard, or your favorite dipping sauce.
Pull one apart carefully to reveal the melted cheese and pickle center.
The Best Pickles to Use
Thick-cut dill pickle chips work especially well because they fit easily inside the biscuit dough.
You can also use:
- Kosher dill pickle chips
- Hamburger dill chips
- Garlic dill pickles
- Spicy pickles
- Bread-and-butter pickles
- Small pickle chunks
- Pickle spears cut into short pieces
- Pickled jalapeños
Avoid extremely thin pickle slices because their flavor and texture can disappear inside the bread and cheese.
Why Should the Pickles Be Dried?
Pickles contain a large amount of brine.
Excess moisture can prevent the biscuit dough from sealing properly and may create a wet or doughy center.
Pat the pickles dry thoroughly before assembling the bombs. If they are particularly wet, allow them to drain on paper towels for approximately 10 minutes.
The Best Cheese for Pickle Bombs
Cheddar adds a sharp flavor that complements tangy dill pickles.
Mozzarella provides the stretchy, melted center. Using both creates a good balance of flavor and texture.
Other options include:
- Colby Jack
- Monterey Jack
- Pepper Jack
- American cheese
- Provolone
- Smoked Gouda
- Swiss cheese
- Cream cheese
- Pimento cheese
Choose block cheese and cut it into cubes. Shredded cheese can be more difficult to contain inside the dough.
How to Keep the Cheese Inside
A small amount of cheese may escape during baking, but careful assembly minimizes leaks.
For the best results:
- Keep the dough cold
- Do not overfill each bomb
- Use small cheese cubes
- Keep the filling away from the edges
- Pinch the seams firmly
- Place the bombs seam-side down
- Repair thin spots before baking
- Chill the assembled bombs for 10 minutes if the dough becomes warm
Even if some cheese leaks, allow it to crisp on the baking sheet and serve it with the bomb.
Can I Use Crescent Roll Dough?
Yes. Separate the crescent dough into triangles, then cut or shape it into portions large enough to enclose the filling.
Pinch any perforations closed before adding the pickle and cheese.
Crescent dough creates a lighter, flakier exterior than biscuit dough.
Can I Use Pizza Dough?
Yes. Divide refrigerated pizza dough into 16 equal portions.
Stretch each portion into a small circle, add the filling, and seal it tightly.
Pizza dough creates a chewier pickle bomb and may need a few additional minutes in the oven.
Can I Use Homemade Dough?
Yes. Homemade biscuit, pizza, or soft roll dough will work.
Divide the dough into pieces weighing approximately one ounce each.
Allow yeast-based dough to rise according to its recipe instructions before baking.
Air Fryer Cheesy Pickle Bombs
Preheat the air fryer to 350°F.
Arrange the bombs seam-side down in the basket, leaving space between them.
Air-fry for approximately 8–11 minutes, turning if necessary, until golden and cooked through.
Work in batches so the air can circulate around each piece.
Bacon Cheddar Pickle Bombs
Add a small amount of cooked, crumbled bacon to each bomb with the cheddar and pickle.
Avoid adding too much bacon because overfilled dough is difficult to seal.
Brush the tops with garlic butter and finish them with ranch seasoning.
Ranch Pickle Bombs
Mix one teaspoon of dry ranch seasoning into the melted butter.
Use cheddar or Colby Jack cheese inside the bombs.
Serve them with additional ranch dressing for dipping.
Spicy Jalapeño Pickle Bombs
Use spicy dill pickles and Pepper Jack cheese.
Add one pickled jalapeño slice to each piece.
Finish the baked bombs with crushed red pepper and serve them with chipotle mayonnaise.
Cheeseburger Pickle Bombs
Add a teaspoon of cooked ground beef to each bomb.
Use American or cheddar cheese with a dill pickle chip.
Serve with ketchup, mustard, or burger sauce.
Be careful not to overfill the dough.
Fried Pickle-Inspired Bombs
Brush the bombs with melted butter and sprinkle the tops with seasoned panko breadcrumbs.
Bake until the dough is golden and the breadcrumb coating is crisp.
Serve with ranch or spicy remoulade.
Cream Cheese Pickle Bombs
Mix softened cream cheese with shredded cheddar, garlic powder, and dried dill.
Chill the mixture until firm, then place a small spoonful inside each piece of dough with the pickle.
Seal and bake as directed.
Sweet and Spicy Pickle Bombs
Use bread-and-butter pickle chips and Pepper Jack cheese.
Add a tiny drizzle of hot honey inside each bomb or brush hot honey over the baked tops.
The combination is sweet, tangy, spicy, and savory.
What to Serve with Cheesy Pickle Bombs
These pickle bombs pair well with:
- Ranch dressing
- Chicken wings
- Mozzarella sticks
- Potato skins
- Sliders
- Nachos
- Onion rings
- French fries
- Fresh vegetable sticks
- Coleslaw
- Chili
- Creamy dips
They make an excellent addition to a game-day appetizer platter.
Can I Prepare Them Ahead?
Yes. Assemble the pickle bombs up to 6 hours in advance.
Arrange them on a parchment-lined baking sheet, cover tightly, and refrigerate.
Brush them with seasoned butter immediately before baking.
Do not prepare them too far in advance because moisture from the pickles can gradually soften the dough.
Storage
Allow leftover pickle bombs to cool completely.
Transfer them to an airtight container and refrigerate for up to 3 days.
Place parchment paper between layers to prevent them from sticking together.
They taste best when reheated until the exterior becomes crisp again.
How to Reheat Cheesy Pickle Bombs
Reheat the bombs in a 350°F oven for approximately 8–10 minutes.
You can also use an air fryer at 325°F for 4–6 minutes.
Microwaving is convenient, but the biscuit exterior will be softer.
Allow the centers to cool briefly before eating because the cheese can become very hot.
Can You Freeze Cheesy Pickle Bombs?
Yes. For the best results, freeze them after baking.
Allow the bombs to cool completely, then freeze them in a single layer. Transfer the frozen bombs to a freezer-safe container and store them for up to 2 months.
Reheat them directly from frozen in a 350°F oven until hot.
Freezing unbaked bombs is possible, but the pickles may release moisture as they thaw.
Frequently Asked Questions
What are cheesy pickle bombs?
They are biscuit dough balls filled with dill pickles and cheese, then brushed with seasoned butter and baked until golden.
What kind of pickles should I use?
Thick dill pickle chips or small pickle chunks work best.
Why should I dry the pickles?
Removing excess brine prevents soggy dough and helps the bombs seal properly.
Can I use pickle spears?
Yes. Cut the spears into short pieces that fit comfortably inside the dough.
What cheese melts best?
Mozzarella, cheddar, Monterey Jack, Colby Jack, and Pepper Jack all melt well.
Can I use shredded cheese?
Yes, but small cubes are easier to enclose and less likely to escape.
Why did the cheese leak out?
The dough may have been overfilled, too thin, or not sealed completely.
Can I use crescent roll dough?
Yes. Pinch the perforations closed and shape the dough securely around the filling.
Can I cook them in an air fryer?
Yes. Cook them at 350°F for approximately 8–11 minutes.
Can I add bacon?
Yes. Add a small amount of cooked, crumbled bacon to each bomb.
Can I make them spicy?
Use spicy pickles, Pepper Jack cheese, jalapeños, or crushed red pepper.
What dipping sauce works best?
Ranch dressing is a classic choice, but burger sauce, honey mustard, spicy mayonnaise, and cheese sauce also work well.
Can I prepare them ahead?
Yes. Assemble and refrigerate them for up to six hours before baking.
How long will leftovers keep?
Refrigerated leftovers keep for up to three days.
Pro Tips
Dry the pickles thoroughly and keep the biscuit dough chilled while assembling the bombs.
Use small cheese cubes and avoid overfilling. Pinch every seam tightly and place the bombs seam-side down.
Serve them warm with ranch dressing for the best combination of golden biscuit dough, melted cheese, tangy pickles, and seasoned garlic butter.
Final Thoughts
These Cheesy Pickle Bombs turn refrigerated biscuit dough, dill pickles, and cheese into an easy appetizer with a warm, gooey center. Garlic butter and Parmesan give the golden exterior extra flavor, while the pickle adds a satisfying tangy bite.
Serve them at game day, parties, movie nights, or family gatherings. You can also customize them as bacon cheddar, spicy jalapeño, ranch, cheeseburger, or cream cheese pickle bombs for a snack everyone will want to pull apart.